Views: 10 Author: Site Editor Publish Time: 2023-09-18 Origin: Site
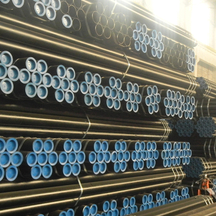
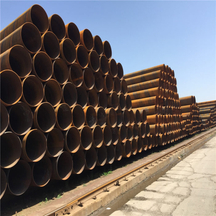
The oil and casing installation process mainly includes pre-installation preparation, drilling and trimming, pipe running operations, etc.
(1) Inspection and preparation before drilling the oil casing and machine tools
No. 1. Quality inspection of oil and casing strings:
1) Check whether the on-site oil and casing material meets the design requirements;
2) Check the thread processing quality of oil casing, joints, and couplings, and use a thread gauge to check the thread tightness;
3) Use an inner diameter gauge to check whether the inner diameter of the oil casing meets the requirements one by one, check the curvature of the oil casing, and remove the substandard oil casing;
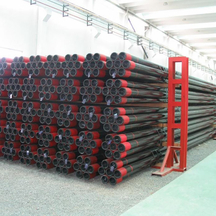
4) Check whether the accessories of the lower oil casing (centralizer, oil casing seat, and oil casing buoyancy device) meet the requirements.
2. Clean the oil casing threads and install the joints: Clean all the oil casing and joint threads in the lower entry hole, apply thread adhesive, and install and tighten the oil casing joints.
3. Carefully measure and match the lower-hole oil casing: measure the lower-hole oil casing one by one, number, review, record, and configure the nipple.
4. Configure the oil and casing centralizer: According to the design of the distance between the oil and casing string centralizers in the lower hole, configure the centralizer and mark the installation position of the centralizer on the numbered oil and casing.
5. Check the oil and casing equipment and tools for lowering the hole: Check the safety and reliability of the lifting system, clamping tools, and the sensitivity of the instruments required for lowering the oil and casing.
(2) Trimming before running oil casing
1. Determination of the lowering position of the oil casing seat: To ensure that the bottom of the oil casing can be seated firmly, the oil casing seat should be located on a relatively complete and hard formation as much as possible. If it is difficult to meet the requirements, the position of the oil casing seat should be fixed with cement first, and then the oil casing can be lowered. If the oil casing is fixed with cement, it can be fixed simultaneously.
2. Drilling, reaming, and repairing: Generally, reaming is required before running oil casing. The diameter of the reaming is determined according to the design and hole-fixing requirements. If the hole does not need to be reamed, a drill tool of just full length (generally not less than 10m in length) should be used to trim the hole wall (also known as reaming) with the same diameter, remove thick mud, and ensure smooth running of oil and casing.
3. Drilling guide and sediment holes: To prevent the oil casing and centralizer from scraping the hole wall during the oil casing running process, causing blocks, mud, and sediment to fall into the bottom of the hole, affecting the accurate running of the oil casing to the equipment. To determine the position, a small diameter sediment hole must be drilled at the bottom of the hole before running the oil casing. It also serves as a guide hole for diameter change drilling after running the oil casing. Its diameter is generally 1 to 2 levels smaller than the inner diameter of the oil casing to be installed, and the depth is 5 to 10 m.
4. Adjust the mud to flush the bottom of the hole: Before running the oil casing, the mud performance in the hole must be adjusted so that the mud performance not only meets the requirements for stabilizing the hole wall but also meets the requirements for lowering the pipe to fix the hole. When replacing mud during drilling, it should be done gradually, and the difference in mud performance should not be too great to prevent hole wall instability. After slurry replacement in the borehole, circulation and surface purification should be strengthened, and at the same time, holes should be punched to remove the sediment at the bottom of the hole.
5. Test the oil casing: After the drilling and refurbishment procedures are completed, you can test the oil casing. The length of the oil casing string is generally 20 to 30m. When trying to remove the oil casing, it is not advisable to bring a centralizer. A shoe guide device is required at the bottom of the oil casing.
(3) Procedures and techniques for running oil casing
1. Assemble the oil casing string: The oil casing string consists of an oil casing guide shoe, oil casing seat, oil casing nipple, buoyancy device (back pressure valve), centralizer, oil casing body, and oil Composed of casing couplings, etc. Before running the oil casing, the oil casing string components should be carefully assembled and tested with a water pump at the orifice, especially the sealing and reliability of the back pressure valve in the buoyancy device. Generally, when the drilling hole is shallow and the weight of the oil casing is light (less than 15t), the buoyancy device does not need to be installed.
2. Oil and casing joint sealing and anti-kickback measures: High-strength adhesive (epoxy resin or anaerobic adhesive) should be applied to the threaded connection part of each lowered oil and casing and the screws should be tightened to increase sealing and Thread connection strength and prevention of kickback during drilling. The movable inner oil casing should also be designed with an anti-kickback device at the oil casing seat.
3. Placement of oil casing centralizer: When running oil casing, the centralizer should be placed according to the design requirements. If it is an externally flat oil casing, try not to weld the centralizer directly to the oil casing. Instead, weld the upper and lower limit stops to leave a certain distance for the centralizer to move up and down so that the oil casing will not get stuck when it is lowered. The centralizer will not be damaged when moving up and down and rotating the oil casing.
4. Key points of oil and casing string lowering operation:
1) When lowering the oil casing string, it must be lowered according to the number and recorded carefully. If an individual oil casing needs to be replaced, the replacement position must be recorded.
2) The oil casing should be lowered slowly and steadily. When encountering obstacles, it should not be pushed hard or pulled hard. It should be moved up and down slowly, and mud should be circulated and punched if necessary.
3) If the lower part of the oil and casing string is equipped with a buoyancy device when the oil and casing string is lowered to the designed position, the flushing liquid must be refilled in the oil and casing to balance the internal and external pressure of the pipe and the buoyancy of the oil and casing.
4) After the oil casing string is accurately lowered to the predetermined position, it should be lifted 0.3 to 0.5m, and the orifice should be firmly aligned with the main rod on the upper machine. Use a large pump of mud to punch holes to remove sediment and mud, and adjust the mud to gradually replace it. Pulp.
5) If there is no need to cement the hole after the oil casing string is lowered into the predetermined position, high-quality polymer chemical mud or polymer solid-free flushing fluid with a sand content of less than 0.2% should be pumped into the hole to fill the oil casing. The gap between the pipe string and the annulus of the hole wall is determined, and then the base of the oil and casing string is placed at the predetermined position, which is beneficial to shock absorption during drilling and subsequent oil and casing lifting.
6) The oil casing string is lowered to the predetermined position. After drilling and replacing the slurry, 80% of the total weight of the oil casing string should be lifted and fixed on the orifice oil casing sealing device. The lower oil casing seat (shoe) carries the load. 20% of the weight of the oil and casing string.
7) After the drilling of the oil and casing strings is completed, the process can be transferred to the next step (cement fixing the hole or sweeping the cement plug, drilling the buoyancy plug, lowering the movable oil casing, drilling, etc.).
8) The running process of the internal movable oil and casing string is basically similar to the running procedure of the external oil and casing string. The focus is on the upper and lower sealing, centering, and shock absorption of the internal movable oil and casing strings. At the same time, the annular gap between the oil and casings must be filled with a solid-phase polymer filling liquid to facilitate the lifting and earthquake resistance of the movable oil and casing.
9) The process of running the tailpipe is basically the same as the above process. The key point is that the liner suspension mechanism must be safe and reliable. It must be firmly clamped when it is lowered to the bottom of the upper oil and casing string. Accurate weighing and observation of changes in the pump pressure gauge before and after the liner is thrown back are required to accurately determine whether the liner was successfully thrown.
5. Expansion oil casing running and expansion process flow: The expansion methods and running processes of different types of expansion oil casing are different. The following uses the physical expansion pipe and the top-down expansion method as an example to introduce the expansion oil casing. Pipe entry and expansion process.
1) Insert the oil casing mud scraper and scrape clean the entire hole section where the expansion pipe is intended to be placed.
2) Insert the diameter gauge from top to bottom to ensure that the inner diameter of the oil casing is larger than the outer diameter of the expansion tube. If the drilling diameter does not meet the requirements, a reaming drill bit needs to be inserted to expand the hole.
3) Lower the expansion pipe to the predetermined position and move it up and down several times, correct the depth of the expansion pipe, circulate the mud under a certain pump pressure, pressurize the seating lance to open, then lift the entire weight of the drilling tool and continue to circulate the mud.
4) Rotate the drilling tool clockwise, gradually increase the rotation speed to 60r/min, increase the pump pressure to a certain value, maintain the pressure for 1 minute, and then stop the rotation and circulation. Wait 5 minutes for the seated spear to release pressure. Lift and press down the drilling tool to check whether the seating spear is seated firmly
5) Throw a steel ball into the drilling tool. After the steel ball is in place, slowly increase the pump pressure to cut off the shear pin. Stop the pump and lift the drilling tool 0.6~0.9m to relieve the pressure. After the pressure is relieved, lower the drilling tool. to original position
6) Turn on the pump, circulate the mud under a certain pump pressure, and at the same time rotate the drilling tool clockwise and gradually increase the rotation speed to 100r/min. Gradually increase the pump pressure to a certain value, and lift the drilling tool at a speed of 0.9 to 1.2m/min until the torque and lifting force are significantly reduced. At this time, stop rotation and circulation, and lift all drilling tools out of the hole.
7) Connect the assembled expansion tool to the lower part of the drill pipe, lower it to the top of the expansion pipe to apply pressure, and lift the expansion tool 0.3m after it is in place.
8) Circulate the mud under a certain pump pressure, while rotating the drill pipe clockwise and gradually increasing the rotation speed to 100r/min. Gradually increase the pump volume until the pump pressure reaches a certain value and then expand the expansion tube downward at a speed of 0.9 to 1.2m/min. At this time, both the torque and the drilling pressure will increase. Continue the expansion operation until the torque and bit pressure disappear (indicating that the expansion is completed), and stop the rotation and circulation.
9) Lift the expansion tool out of the well, and then conduct expansion tube inner diameter measurement and pressure test according to requirements.
About Us / News / Product / Project / Quality Assurance / Service / Contact Us